4.1 KiB
Take a video and replace the face in it with a face of your choice. You only need one image of the desired face. No dataset, no training.
That's it, that's the software. You can watch some demos here.
Installation
Do not create any issues regarding installation problems. I am only responsible for issues in this program, use google for help.
- install
python,pipandgit - install
ffmpeg - run the following commands in terminal:
git clone https://github.com/s0md3v/roop
cd roop
pip install -r requirements.txt
-
Download this file and keep it in roop directory. Mirror #1, Mirror #2, Mirror #3, Mirror #4
-
If you plan on using CPU, install
onnxruntimewithpip install onnxruntime==1.15.0. If you have a good GPU, read ahead.
GPU Accleration (Optional)
If you have a good enough GPU, you can use it to speed-up the face-swapping process by running run.py with --gpu flag.
If you plan on doing it, you will need to install the appropriate onnxruntime-* package as follows:
NVIDIA
Install cuda and then,
pip install onnxruntime-gpu==1.15.0
AMD
Install ROCM-based torch packages from here and then,
git clone https://github.com/microsoft/onnxruntime
cd onnxruntime
./build.sh --config Release --build_wheel --update --build --parallel --cmake_extra_defines CMAKE_PREFIX_PATH=/opt/rocm/lib/cmake ONNXRUNTIME_VERSION=$ONNXRUNTIME_VERSION onnxruntime_BUILD_UNIT_TESTS=off --use_rocm --rocm_home=/opt/rocm
pip install build/Linux/Release/dist/*.whl
Usage
Note: When you run this program for the first time, it will download some models ~300MB in size.
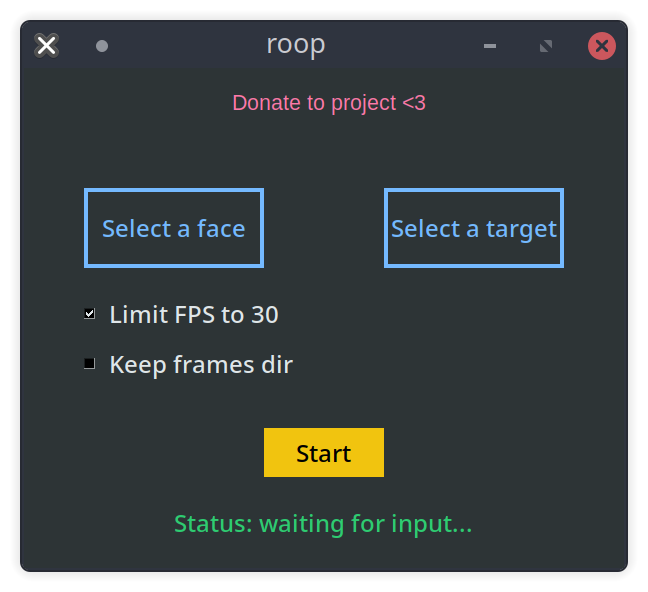
Executing python run.py command will launch this window:

Choose a face (image with desired face) and the target image/video (image/video in which you want to replace the face) and click on Start. Open file explorer and navigate to the directory you select your output to be in. You will find a directory named <video_title> where you can see the frames being swapped in realtime. Once the processing is done, it will create the output file. That's it.
Don't touch the FPS checkbox unless you know what you are doing.
Additional command line arguments are given below:
-h, --help            show this help message and exit
-f SOURCE_IMG, --face SOURCE_IMG
                        use this face
-t TARGET_PATH, --target TARGET_PATH
                        replace this face
-o OUTPUT_FILE, --output OUTPUT_FILE
                      save output to this file
--keep-fps            keep original fps
--gpu                 use gpu
--keep-frames         don't delete frames directory
Looking for a CLI mode? Using the -f/--face argument will make the program in cli mode.
Future plans
- Improve the quality of faces in results
- Replace a selective face throughout the video
- Support for replacing multiple faces
Disclaimer
Deepfake software already exist. This is just an experiment to make the existing techniques better. Users are expected to use this to learn about AI and not use it for illicit or unethical purposes. Users must get consent from the concerned people before using their face and must not hide the fact that it is a deepfake when posting content online. I am not responsible for any malicious activity done through this software, this is a purely educational project aimed at exploring AI.
Credits
- ffmpeg: for making video related operations easy
- deepinsight: for their insightface project which provided a well-made library and models.
- and all developers behind libraries used in this project.
