| .github | ||
| core | ||
| .flake8 | ||
| demo.gif | ||
| gui-demo.png | ||
| LICENSE | ||
| README.md | ||
| requirements.txt | ||
| run.py | ||
Take a video and replace the face in it with a face of your choice. You only need one image of the desired face. No dataset, no training.
That's it, that's the software. You can watch some demos here.
Disclaimer
Better deepfake software than this already exist, this is just a hobby project I created to learn about AI. Users must get consent from the concerned people before using their face and must not hide the fact that it is a deepfake when posting content online. I am not responsible for malicious behaviour of end-users.
To prevent misuse, it has a built-in check which prevents the program from working on inappropriate media.
How do I install it?
Issues according installation will be closed without ceremony from now on, we cannot handle the amount of requests.
There are two types of installations: basic and gpu-powered.
-
Basic: It is more likely to work on your computer but it will also be very slow. You can follow instructions for the basic install here.
-
GPU: If you have a good GPU and are ready for solving any software issues you may face, you can enable GPU which is wayyy faster. To do this, first follow the basic install instructions given above and then follow GPU-specific instructions here.
How do I use it?
Note: When you run this program for the first time, it will download some models ~300MB in size.
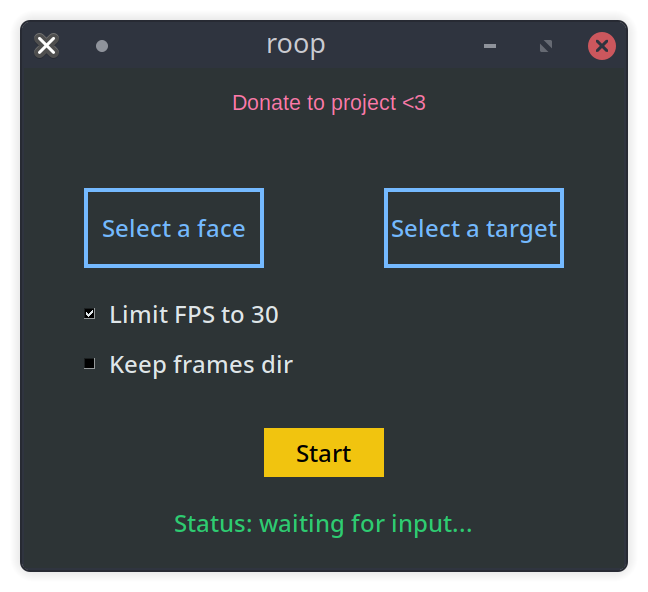
Executing python run.py command will launch this window:

Choose a face (image with desired face) and the target image/video (image/video in which you want to replace the face) and click on Start. Open file explorer and navigate to the directory you select your output to be in. You will find a directory named <video_title> where you can see the frames being swapped in realtime. Once the processing is done, it will create the output file. That's it.
Don't touch the FPS checkbox unless you know what you are doing.
Additional command line arguments are given below:
options:
  -h, --help            show this help message and exit
  -f SOURCE_IMG, --face SOURCE_IMG
                        use this face
  -t TARGET_PATH, --target TARGET_PATH
                        replace this face
  -o OUTPUT_FILE, --output OUTPUT_FILE
                        save output to this file
  --gpu                 use gpu
  --keep-fps            maintain original fps
  --keep-frames         keep frames directory
  --max-memory MAX_MEMORY
                        maximum amount of RAM in GB to be used
  --max-cores CORES_COUNT
                        number of cores to be use for CPU mode
Looking for a CLI mode? Using the -f/--face argument will make the program in cli mode.
Future plans
- Improve the quality of faces in results
- Replace a selective face throughout the video
- Support for replacing multiple faces
Credits
- ffmpeg: for making video related operations easy
- deepinsight: for their insightface project which provided a well-made library and models.
- and all developers behind libraries used in this project.
